Gaggia Classic Temperature Surfing: A Step-by-Step Guide

Coffee & Wellness Writer
The Gaggia Classic makes excellent espresso, but its single boiler never holds a steady temperature - temperature surfing is how you brew in the sweet spot anyway.
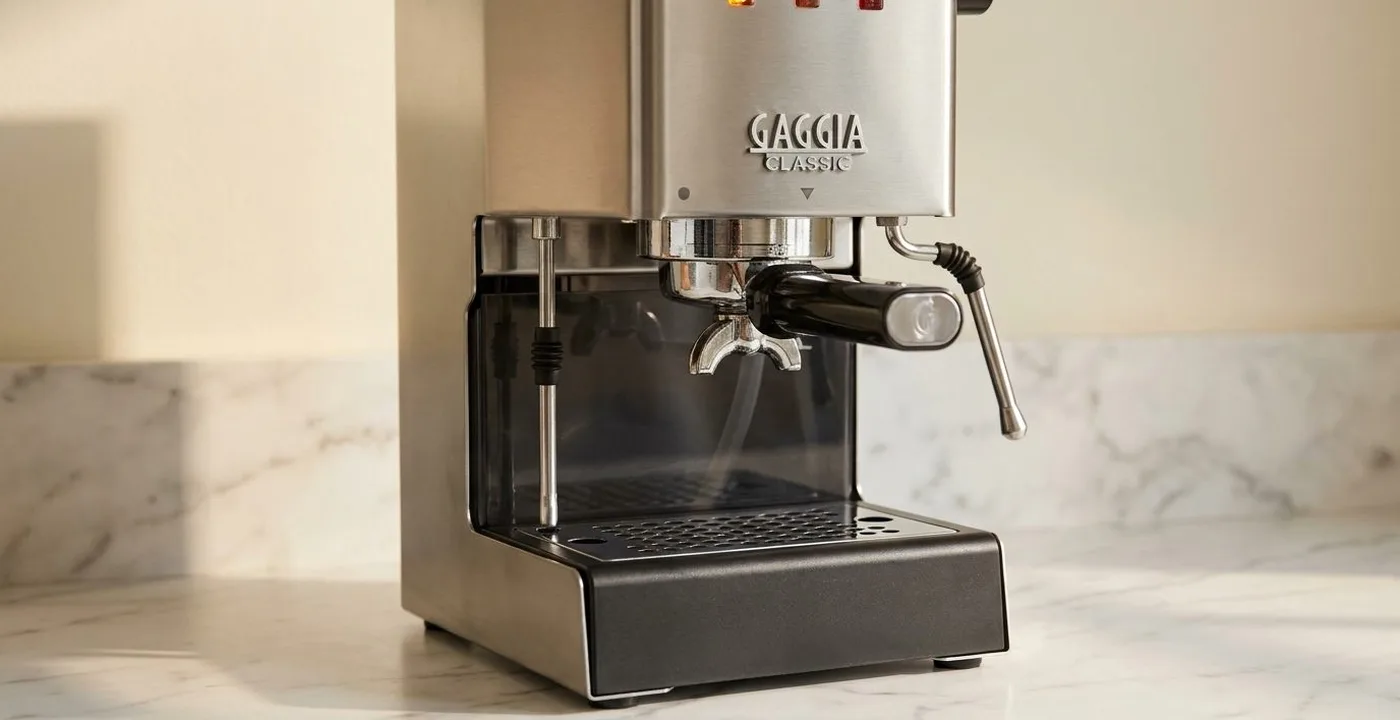
Table of Contents
Some of the links in this article are affiliate links, which help fund our independent review work at no extra cost to you. Every recommendation is based on hands-on testing through The Editor Lab methodology. No brand pays to appear, and no placement is guaranteed.
The Gaggia Classic is one of the best entry-level espresso machines you can buy. It is also, in stock form, one of the most thermally unstable. The single boiler heats fast and runs hot, but the brew thermostat overshoots and falls between shots, so the water you pulled at 95C this morning may be 88C this afternoon. Temperature surfing is how you brew in the gaggia classic brew temperature sweet spot anyway, by timing the shot to a known point in the boiler cycle.
This guide is built from two sources. I spent five and a half years inside a traditional espresso machine manufacturer working alongside the engineers who design exactly these systems, and I cross-checked every step here against current owner consensus on the Classic line. The routine below is the one that works.
Editor's Note
Editor's Note. Written by James Bellis. I founded Balance Coffee in 2020. Before that, I was Sales and Marketing Manager at Sanremo UK for five and a half years, where I was trained by authorised Sanremo engineers on boiler systems, PID control, and temperature stability on traditional espresso machines. Disclosure: Balance Coffee is a UK coffee roaster I founded. We sell beans, not machines, so nothing in this guide is a product of mine.
What Temperature Surfing Is (and Why the Gaggia Classic Needs It)
Temperature surfing is the practice of timing your espresso shot to a specific point in the boiler's heating cycle so the brew water lands inside the 92 to 95C window the Specialty Coffee Association recognises as the standard espresso brew range. It is not a setting on the machine. It is something you do with a stopwatch and the brew-ready light.
The reason you have to do it is structural. The Gaggia Classic has one small boiler and one brew thermostat. The thermostat turns the heating element on when the water drops below a target, and off when it climbs above. That sounds tidy in theory, but in practice the element keeps pushing heat into the boiler for several seconds after it switches off, so the water overshoots the target. It then cools, sometimes below the target, before the element kicks back on. The result is a saw-tooth temperature curve at the group head that swings by several degrees between shots.
The "ready" light reflects the thermostat, not the actual brew water. So a light that has been on for thirty seconds is not the same brewing condition as a light that has been on for ten. You either control which point of the cycle you pull on, or you accept that your shots will taste different from one another for reasons that have nothing to do with the gaggia classic pressure in the group or how you ground the beans.
How to Temperature Surf the Gaggia Classic: Step by Step
Here is the gaggia classic temp surfing routine I recommend for a stock Classic or Classic Pro. It is the surf-on-the-fall method, which is the most controllable and the one most experienced owners now default to.
- Heat the machine fully for 20 to 30 minutes with the portafilter locked into the group. Five minutes is not enough. The boiler reaches temperature quickly, but the brass group head, the portafilter and the basket take much longer to come up. Cold metal in the brewing path will pull heat out of your water on every shot. Leaving the portafilter in is non-negotiable.
- Flush a small amount of water through the group before your first shot of the session. Two or three seconds is enough. This settles the temperature in the group and confirms the machine is delivering hot water, not stale water from sitting.
- Watch the brew-ready light and wait for the element to switch off. The light going out is your signal. It means the thermostat has cut power because the boiler has hit its top temperature. From that moment, the boiler is cooling.
- Start a timer the moment the light goes out. A wristwatch, a phone timer, the second hand on a kitchen clock. Anything that gives you a consistent reference.
- Wait your chosen interval, then pull the shot. A starting point that works for most medium roasts is 30 seconds after the light goes out. Pull the shot, taste, and adjust the wait time for the next one if needed. Shorter wait = hotter brew. Longer wait = cooler brew.
The routine is short. The discipline is in doing the same thing every time so the only variable that changes between shots is the one you choose to change.
Surfing on the Rise vs Surfing on the Fall
You have two windows in every cycle. Surfing on the fall means brewing after the heating element switches off, as boiler temperature descends from its peak. Surfing on the rise means brewing shortly after the element switches back on, while temperature is climbing toward the next peak. Both put you near the brew target, but they reach it from opposite directions.
Surf on the fall is the method described in the routine above. The reason it works is that the temperature descent is slower and more predictable than the climb, so your timing tolerance is wider. A wait of 28 seconds and a wait of 32 seconds will produce broadly similar shots. The cycle gives you room to be slightly off without ruining the cup.
Surf on the rise is faster, and the appeal is obvious if you are pulling a shot in a hurry. The trouble is that the temperature climb is steep and short. A second or two earlier and you are below the target. A second or two later and you have overshot into the territory that bakes the puck and pushes the shot toward bitterness. The window of forgiveness is narrow.
If you only learn one method, learn the fall. It is more consistent, easier to repeat under pressure, and gives you the dial you need to adjust for different roasts. You can experiment with the rise once you have the fall locked in, but it is not the starting point.
Adjusting Your Timing for Light and Dark Roasts
A shorter wait after the brew light goes out produces a hotter shot. A longer wait produces a cooler one. Once your routine is consistent, this is the dial you use to match the brew temperature to the roast in your hopper.
Light roasts are denser and harder to extract. They tend to taste sour, hollow or grassy if the brew water is too cool, because not enough of the soluble compounds make it into the cup. For a light roast, aim near the top of the 92 to 95C window. In practice, that means a shorter wait after the light goes out, around 15 to 25 seconds.
Dark roasts are more soluble. They give up flavour easily and tip into bitterness if the water is too hot, because over-extraction pulls out the harsh, ashy compounds the roaster has already developed. For a dark roast, aim near the bottom of the window. Wait longer, around 40 to 50 seconds after the light goes out.
The target is not a single number. It is a window, and a roast tells you where in the window to land. Pick a starting wait, taste the shot, then adjust the next one by five-second increments until it tastes right. Keep the grind, the dose and the best coffee beans uk you choose constant while you do this, otherwise you are changing too many things to learn anything.
Common Temperature Surfing Mistakes
The first mistake is not heating the machine long enough. Twenty minutes is the floor, thirty is better, and the portafilter has to be in the group the whole time. A warm boiler and a cold portafilter still gives you a cold shot. This single mistake undoes more surfing attempts than any other.
The second is changing two variables at once. If you tweak the wait time and the grind size on the same shot, you have learned nothing about either. Change one thing. Pull. Taste. Then decide.
The third is chasing perfect surfing while the rest of the brew chain is unstable. Surfing controls temperature. It does not fix a grinder that distributes unevenly, a dose that varies by a gram between shots, or beans that have been sitting open on the counter for three weeks. If those things are not nailed down, the temperature window is not your problem.
The fourth is over-thinking it. Let us be honest about what temperature surfing actually is: a workaround for a design limitation, not a feature. You are hand-managing a job that a PID does silently. It works, and it is genuinely satisfying once it clicks, but if you only pull one or two shots a day, the inconsistency you are chasing may be smaller than the faff of chasing it.
Do You Still Need to Temperature Surf? PID and the Gaggia Classic Pro
The honest answer is no, not if you have a PID. A PID controller replaces the simple thermostat with an electronic loop that holds the boiler within a fraction of a degree of your target. The brew-ready light becomes meaningful again, the cycle flattens, and the surf disappears as a useful technique because the machine is no longer overshooting and falling.
A stock Classic and a stock Classic Pro still need surfing. Neither ships with a PID. Aftermarket PID kits for the Classic line are widely available, and a separate gaggia classic up review addresses the PID-equipped model in the current range.
If surfing every single shot starts to feel like a chore, that is your answer: fit a PID. It holds brew temperature to within a fraction of a degree and makes surfing obsolete. Surfing is the free fix; a PID is the permanent one, and on a machine you plan to keep for a decade, the permanent fix usually wins.
The Boiler Temperature Cycle Explained
The Classic's small boiler is described in detail on the Gaggia product pages. The brew thermostat opens around a target, but the heating element keeps pushing heat into the boiler for several seconds after, so temperature overshoots. It then cools below the target before the element switches back on. The brew-ready light follows the thermostat, not the actual brew water temperature.
| Cycle phase | What is happening | Temperature direction |
|---|---|---|
| Light on, heating | Element supplying power | Climbing |
| Light just off | Element off, residual heat still rising | Overshooting |
| Light off, settling | Residual heat dissipating | Falling toward target |
| Light off, late | Cooled below target | Below target |
| Light back on | Cycle restarts | Climbing again |
Frequently Asked Questions
What temperature should I brew a Gaggia Classic at?
The Specialty Coffee Association range for espresso is 92 to 95C at the group. On a stock Classic, you reach that window by timing the shot to the boiler cycle rather than by setting a number on the machine.
Do I need to temperature surf if I have a PID?
No. A PID controller holds the boiler within a fraction of a degree of your set point, so the cycle flattens and the surf becomes pointless. Surfing is a workaround for the stock thermostat, which a PID replaces.
How long should I wait after the light goes out?
Around 30 seconds is a good starting point for a medium roast. Shorter for lighter roasts (15 to 25 seconds), longer for darker roasts (40 to 50 seconds). Adjust by five-second steps until the cup tastes right.
Do all Gaggia Classics temperature surf the same way?
Broadly yes. The Classic and Classic Pro share the same single-boiler-and-thermostat architecture, so the surf-on-the-fall routine applies to both. PID-equipped models do not need it.
A wellness entrepreneur and biohacker, James explores the intersection of hospitality and health - from clean fuel and recovery tools to mindful routines that build balance into daily life.