How to Use a Cafetiere: Method, Ratios and Mistakes


Grind it coarser, wait after the kettle, and pour instead of pressing for a cleaner cup.
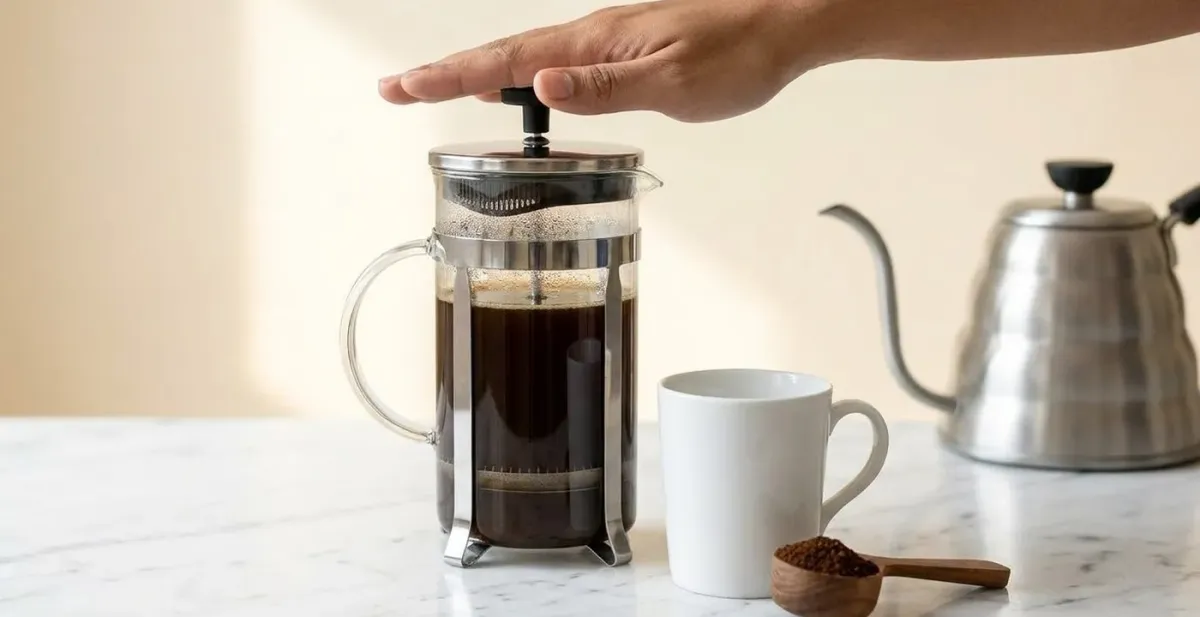
Table of Contents
Some of the links in this article are affiliate links, which help fund our independent review work at no extra cost to you. How we assessed these products is explained in this article and our Editor Lab methodology. No brand pays to appear, and no placement is guaranteed.
You can learn how to use a cafetiere in under a minute, and most people already have. Warm the pot, add your coffee, pour the water, wait four minutes, press slowly. If you already know this and your coffee still comes out bitter, silty or weaker than you hoped, the method was never your problem.
A cafetiere and a French press are the same device - cafetiere is the British name.
The rest of this guide is for you. It gives you the dose fast, in grams and level tablespoons for a single mug and for the standard UK three-cup and eight-cup pots, then works through the six specific things that make cafetiere coffee taste disappointing and what to change for each one. Two of those changes are less common advice: skip the bloom, and stop pressing the plunger all the way down.
I started in coffee back in 2012 and spent five and a half years inside Sanremo, a manufacturer of professional espresso machines, visiting almost 300 UK roasteries along the way and training alongside their extraction team on grind distribution and particle size, the science behind the grind advice later in this guide. I have since roasted my own coffee and was featured in Forbes writing about clean coffee. Every ratio and timing figure here was brewed and tested on standard UK three-cup and eight-cup cafetieres, using both supermarket pre-ground and freshly ground coffee, through The Editor Lab.
The Method, Step by Step
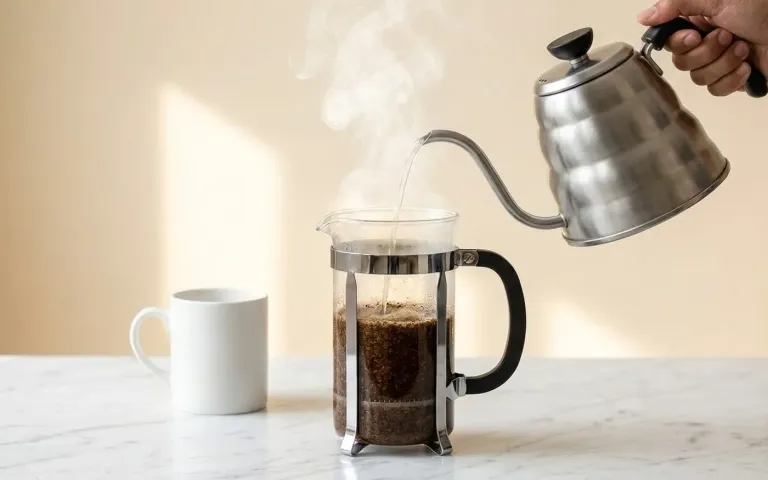
- Warm the pot. Rinse the cafetiere with hot water and tip it out. A cold glass pot pulls heat out of your brew water in the first thirty seconds, and that heat loss is the single easiest mistake to fix.
- Add your coffee to the empty pot first. Coffee in, then water. Several search results ask this exact question and the standard answer is correct: adding water to dry grounds first stops you saturating them evenly.
- Pour water just off the boil (see the water temperature section below for why this matters more than it sounds).
- Stir once, gently, to make sure every ground is wet. Skip this and you will get patches of weak, under-extracted coffee floating next to patches of bitter, over-extracted sludge in the same cup.
- Put the lid on with the plunger up and leave it for 4 minutes.
- Skim the crust off the top with a spoon before you press. This single step removes a meaningful amount of the fine sediment that would otherwise end up in your cup.
- Either press slowly, using light pressure and stopping the moment you feel resistance, or decant instead without pressing at all (the better option for most people - covered in full below).
That is the whole method. Everything past this point is about the six reasons it does not always work.
How Much Coffee Per Cup
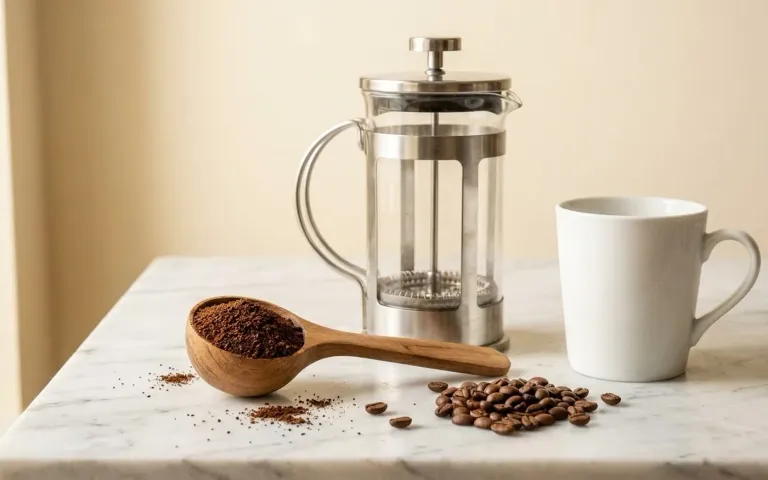
Most cafetiere guides say "one tablespoon per cup" without saying what a cup is. That gap is the reason your ratio is probably wrong.
Bodum, whose three-cup and eight-cup naming is the de facto UK standard other pot brands mirror, defines a "cup" as roughly 125ml, not a mug. A three-cup Bodum-style pot holds close to 350ml, not three mugs of coffee.
Work from weight, not spoons, and you remove the ambiguity entirely. The table below is close to a 1:16 coffee-to-water ratio, a touch stronger than the Speciality Coffee Association's Golden Cup reference of 55g per litre (about 1:18). A level tablespoon of coarsely ground coffee weighs close to 7g, so use the tablespoon column only if you do not own scales.
| Serving | Capacity | Water | Coffee | Level tablespoons | Brew time |
|---|---|---|---|---|---|
| One mug | 250ml | 235g | 15g | 2 | 4 minutes |
| 3-cup pot | 350ml | 330g | 21g | 3 | 4 minutes |
| 4-cup pot | 500ml | 470g | 30g | 4 | 4 minutes |
| 8-cup pot | 1,000ml | 940g | 59g | 8 | 4 minutes |
If you are brewing for one in a large pot, do not simply halve a full batch and leave it sitting in the pot. Brew closer to your actual serving size, or decant everything you are drinking now and leave the rest off the grounds (more on why in the plunging section below).
How Long to Brew, and When to Press
Four minutes is the standard, and it is a good default for a medium roast at a medium-coarse grind. But treat it as a range, not a rule.
If your coffee tastes sharp and thin at 4 minutes, you are likely under-extracting: leave it closer to 5. If it tastes bitter and heavy at 4 minutes, you are over-extracting: pull it back to 3 minutes 30 seconds, or check your grind is not too fine.
Pressing early does not "stop" extraction the way people assume. Coffee still sits in contact with the grounds below the plunger mesh until you pour, so a coffee you press at 2 minutes and drink slowly is still extracting in the pot the whole time. Set a timer for the full brew and press once, rather than pressing early to "check" and disturbing the bed.
Six Reasons Your Cafetiere Coffee Tastes Disappointing
- Your grind is too fine. A cafetiere needs a coarse, breadcrumb-like grind. Pre-ground "filter" coffee from a supermarket is usually ground for a drip machine, which is finer than a cafetiere wants, and fine grounds are what create the silt and bitterness most people complain about. See the grind section below for the fix.
- Your coffee is stale. Ground coffee loses aroma and flavour within days of opening, and most supermarket pre-ground bags have already been sitting on a shelf for weeks by the time you buy them. If you are storing your beans badly on top of that, you compound the problem. How to store coffee beans properly buys you real time; the freshness gap is usually bigger than the technique gap. Badly stored, damp beans left for long periods can also develop mould and mycotoxins, a separate and rarer problem from ordinary staleness, but one more reason proper storage is worth taking seriously.
- Your water is too hot or too cold. Straight off a rolling boil scalds the grounds and pulls out bitter compounds early. Water that has cooled too far under-extracts and tastes flat. Off the boil by roughly 30 seconds is the right target, covered in full below.
- You are pressing all the way down. The plunger forces fine sediment through the mesh under pressure, which is where most of the sludge in your cup comes from. Decanting instead of pressing removes this almost entirely, and it is the single biggest fix on this list.
- You are leaving coffee sitting on the grounds after brewing. Even after you press, the coffee below the plunger keeps extracting against the packed bed. Pour everything off into a separate vessel the moment your timer ends, rather than leaving the pot half full on the side.
- Your ratio is wrong because "cup" is ambiguous. Covered above: if you have been using one tablespoon per mug rather than one tablespoon per 125ml Bodum-style cup, your coffee has probably been under-dosed for as long as you have owned the pot.
Grind Size: The Variable That Matters Most
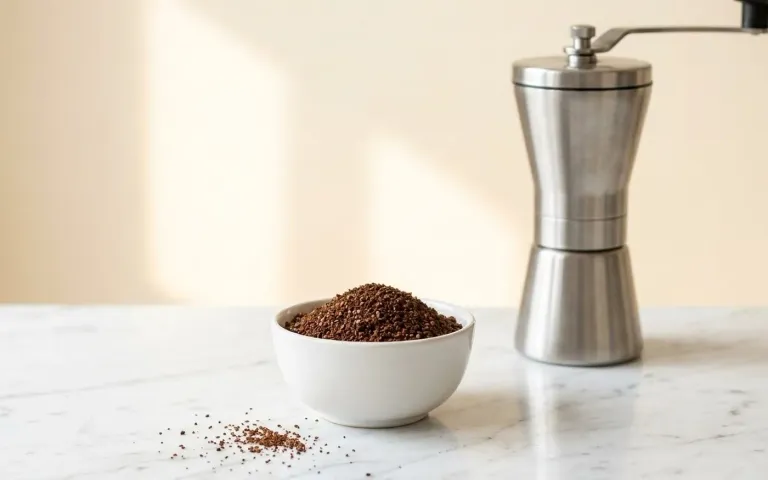
If you fix one thing from this guide, make it the grind. I learned grind distribution and particle size from the extraction team at Sanremo, and it is the variable that moves a cafetiere from "disappointing" to good faster than anything else on this page.
You want a grind that looks like coarse breadcrumbs or rock salt, distinctly coarser than what you would use in a drip filter machine and much coarser than espresso. Too fine, and you get silt, bitterness and a sludgy mouthfeel. Too coarse, and you get a weak, watery cup because the water passes through without extracting enough.
Most supermarket pre-ground coffee is milled for filter machines, not cafetieres, which is a large part of why it under-performs here. If pre-ground is what your budget allows, look specifically for a bag labelled "coarse" or "cafetiere grind" rather than a generic "filter" or "all-purpose" grind.
Best ground coffee UK compares the pre-ground bags worth buying if grinding fresh is not going to happen. The honest 2025-2026 update on this: cheap electric burr grinders under GBP 40 have become usable in the last couple of years, in a way they were not before, and one of those is now a real option if you want to grind fresh without a big spend.
Should You Bloom?
This is contested, and I will take a side. Some UK roaster brewing guides tell you to bloom a cafetiere: pour a small amount of water first, wait 30 seconds for the coffee to degas, then top up the rest. Office Coffee Co's brewing guide says exactly that: pour a little water, wait for the bloom, then add the rest 30 seconds later.
I do not bloom a cafetiere, and I am not alone in that. A widely read French press guide on r/Coffee, written by a self-described beginner, says to pour all the water at once, because a bloom lowers the temperature and is pointless. Glasgow roaster We Are Coffee Co. agrees: pour all the water in one go.
A cafetiere holds far more water than a pour-over cone, so a small bloom pour barely changes the coffee-to-water contact and mostly drops your brew water temperature before the real brew starts, working against you rather than for you. Blooming matters in pour-over because you are controlling a thin, fast-draining bed. In a cafetiere, you are not.
If you want to test it yourself, brew one batch each way and taste them side by side. In our testing the difference was small, and what difference there was favoured skipping it.
Stop Plunging - Decant Instead
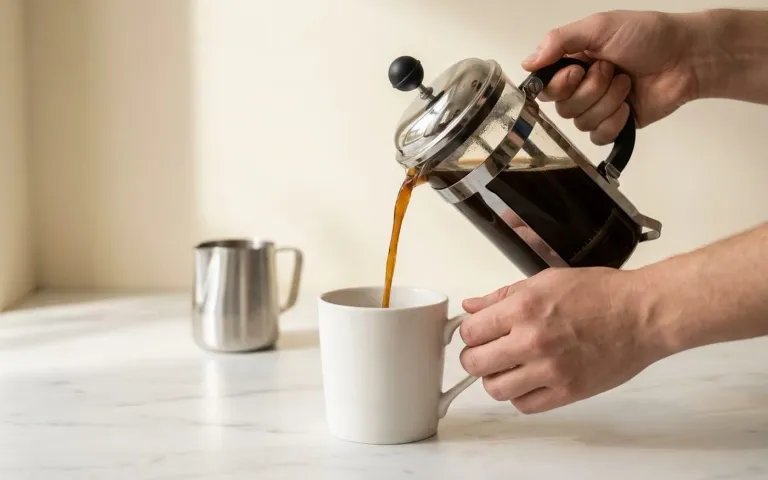
Here is the change most likely to fix your specific complaint if it is silt or sludge: stop pressing the plunger all the way to the bottom.
Brew as normal, skim the crust with a spoon once the timer ends, then instead of pressing, pour the coffee off the top of the pot into a jug or straight into your mug, leaving the last inch or so of grounds and fines behind in the base. Few cafetiere guides recommend decanting, because it means telling you to stop using the mechanism the device is named after.
But it is the actual fix for the format's defining complaint, and it produces a noticeably cleaner cup than pressing all the way down, particularly on a fine or inconsistent grind. The standard advice persists mostly because "press the plunger" is the instruction that came printed on the box.
Water Temperature, and Why "Off the Boil" is Doing a Lot of Work
Boiling water is 100°C. The SCA's recommended brew range for coffee sits several degrees below that, at 93°C, give or take 3°C (90-96°C). "Just off the boil" is doing the job of that gap in every recipe you have read, and almost none of them explain it.
In practice: boil your kettle, then let it sit for 30 to 45 seconds before pouring over your grounds (BBC Good Food's cafetiere guide says to wait a minute). If you are using a variable-temperature kettle, set it to 94°C directly, as Glasgow roaster We Are Coffee Co. also advises.
Water that is still boiling when it hits the grounds scalds them and pulls out sharp, bitter compounds early in the brew. This single adjustment fixes a surprising amount of "bitter cafetiere coffee" on its own, with no change to your dose or grind.
Cafetiere Coffee with Milk
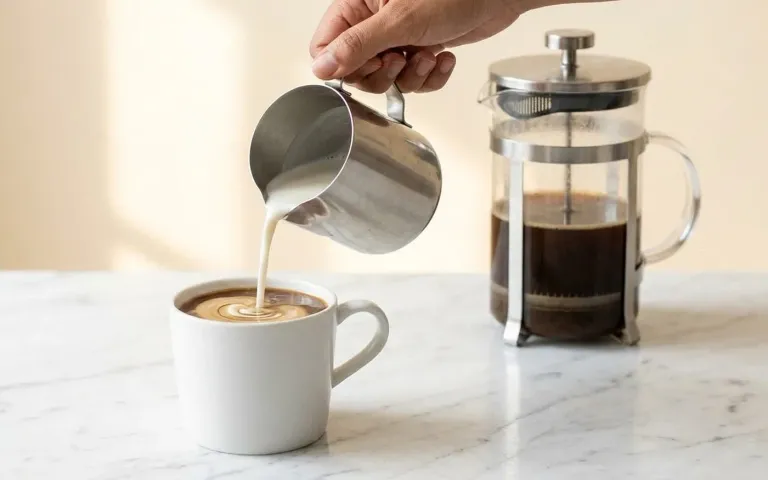
A cafetiere is a black-coffee method at heart, with no crema and no microfoam to carry milk the way an espresso-based drink does. If you are adding milk, steamed or warmed milk works better than cold milk straight from the fridge, because cold milk drops the temperature of the whole cup fast and flattens the flavour you just brewed.
Your milk choice matters more here than in a flat white, precisely because there is nothing else in the cup to disguise it. If you want the milk-forward drink instead, how to make a flat white covers that method on its own terms. If you are using an alternative milk, oat tends to hold up best against cafetiere coffee specifically because it does not curdle or separate against the coffee's acidity the way some other alternatives can.
What a Cafetiere is Bad At
Being honest about this is the fastest way to be believed about everything above.
A glass cafetiere is not hob-safe. This shows up as a related search for a reason: people try it, and glass on a direct heat source can crack. If you want a cafetiere for camping or hob use, buy a stainless steel or double-walled version, not a glass one.
A cafetiere does not hold heat well. By the third cup from an eight-cup pot, your coffee is noticeably cooler than the first cup was, because there is no insulation and no reheating element.
And it is a poor match for delicate light roasts, the coffees with the most fragile, fruit-forward flavours: immersion brewing with a metal mesh filter lets through more body and oil than paper filtering does, which suits a full-bodied dark roast far better than it suits a light one. If you are drinking light roast, a pour-over will show you more of what that coffee can do.
Cleaning It Properly
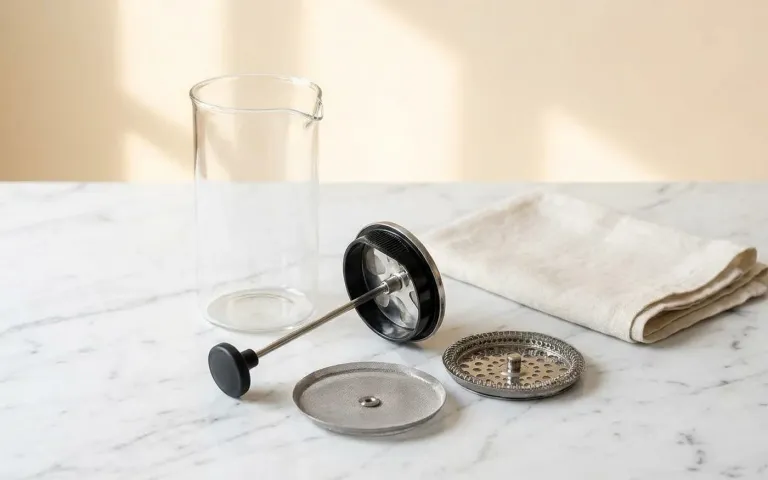
Rinse the pot, plunger and mesh with hot water straight after every brew, before the coffee oils have a chance to dry onto the glass or the filter. Oil residue left to build up over weeks is what makes cafetiere coffee taste stale and off even when your beans are fresh, and it is a different problem from anything covered above.
Take the plunger apart fully at least once a week. The mesh disc, the spiral, and the crossplate all trap fine grounds that a quick rinse does not reach, and a partially blocked mesh is a common, overlooked cause of a weak or uneven brew.
Most cafetiere parts are dishwasher safe, but check your specific model, because some spiral mesh assemblies distort under prolonged heat. If your mesh has warped or the seal no longer sits flush no matter how well you clean it, replacing the pot is usually cheaper than chasing spare parts; our pick of the best cafetiere covers what to look for in a replacement.
Is It Worth the Effort?
For the cost, yes. A cafetiere is one of the cheapest routes to good coffee in a British kitchen, and everything in this guide is free once you own the pot: a grind adjustment, a 30-second wait after the kettle, decanting instead of pressing. If you want a broader starting point on beans before narrowing to this method specifically, our pick of the best coffee beans UK covers the full range.
If you want to understand what is in the bag before you next buy one, our guide to arabica versus robusta explains why some cheaper blends taste flatter than others in a cafetiere specifically. If you would rather skip the testing and go straight to specific bags, best coffee for cafetiere rounds up the beans that hold up best in this brew method. If caffeine is what you are cutting back on rather than cutting out entirely, the best decaf coffee beans UK work with the same ratios and method above.
If what you want most mornings is a hot drink with minimal thought, say so honestly to yourself and pick from what the best instant coffee UK has to offer rather than fighting your cafetiere every day. There is no failure in that. But if you already own a cafetiere and have been getting "alright but disappointing" results from it, the fixes above cost you nothing beyond a few minutes of attention to the grind and the pour.
FAQ
Frequently Asked Questions
How many spoons of coffee do I put in a cafetiere?
For a 3-cup pot, use 3 level tablespoons of coarsely ground coffee, close to 21g. For a full 8-cup pot, use 8 level tablespoons, close to 59g. A level tablespoon of coarse grounds weighs roughly 7g, which is why "one tablespoon per cup" only works if your cup is the 125ml Bodum-style measure, not a full mug.
How long before you press a cafetiere?
Four minutes from the moment you pour the water, as a starting point. If your coffee tastes thin or sharp, extend to closer to 5 minutes. If it tastes bitter or heavy, pull back to around 3 minutes 30 seconds, or check that your grind is not too fine for the method.
Should I add water or coffee first?
Coffee first, then water. Put your ground coffee into the empty, warmed pot, then pour the water over it and stir once to make sure every ground is wet. Adding water first makes it far harder to saturate the grounds evenly, which leads to patchy extraction across the brew.
What are common mistakes when using a cafetiere?
The most common are grinding too fine, using stale pre-ground coffee, pouring water straight off a rolling boil, pressing the plunger all the way to the bottom, and leaving coffee sitting on the grounds after brewing. Fixing the grind and switching to decanting rather than pressing solves most complaints on their own.
What are the downsides of using a French press?
It does not hold heat well over several cups, a glass version is not hob-safe, and the metal mesh filter lets through more oil and fine sediment than paper filtering, which suits full-bodied roasts better than delicate light roasts. It also takes longer than a pod or automatic drip machine, since there is no shortcut around the 4-minute steep.
Can you use a cafetiere on the hob?
Not if it is glass. Glass cafetieres are not designed for direct heat and can crack under it. If you specifically want stovetop use, such as for camping, buy a stainless steel or double-walled cafetiere rather than a standard glass one, and check the manufacturer's own guidance for that model.
Can you make tea in a cafetiere?
Yes, and the mesh plunger works well for straining loose-leaf tea once it has brewed. Rinse the pot thoroughly first if you have just used it for coffee, since residual coffee oil will taint the taste of tea noticeably more than it would another pot of coffee.
How long should coffee brew in a cafetiere?
Around 4 minutes for a medium roast at a medium-coarse grind, treated as a starting point rather than a fixed rule. Adjust in either direction based on taste: longer if it tastes weak or sharp, shorter if it tastes bitter, and always skim the crust and either press gently or decant once the time is up.

A wellness entrepreneur and biohacker, James explores the intersection of hospitality and health - from clean fuel and recovery tools to mindful routines that build balance into daily life.