How to Froth Milk: A Roaster's Guide, Machine or Not

Coffee Writer & Biohacker
Nine results and a video carousel, and only one gives a temperature - the skill turns on two numbers and one angle, and nobody prints them.
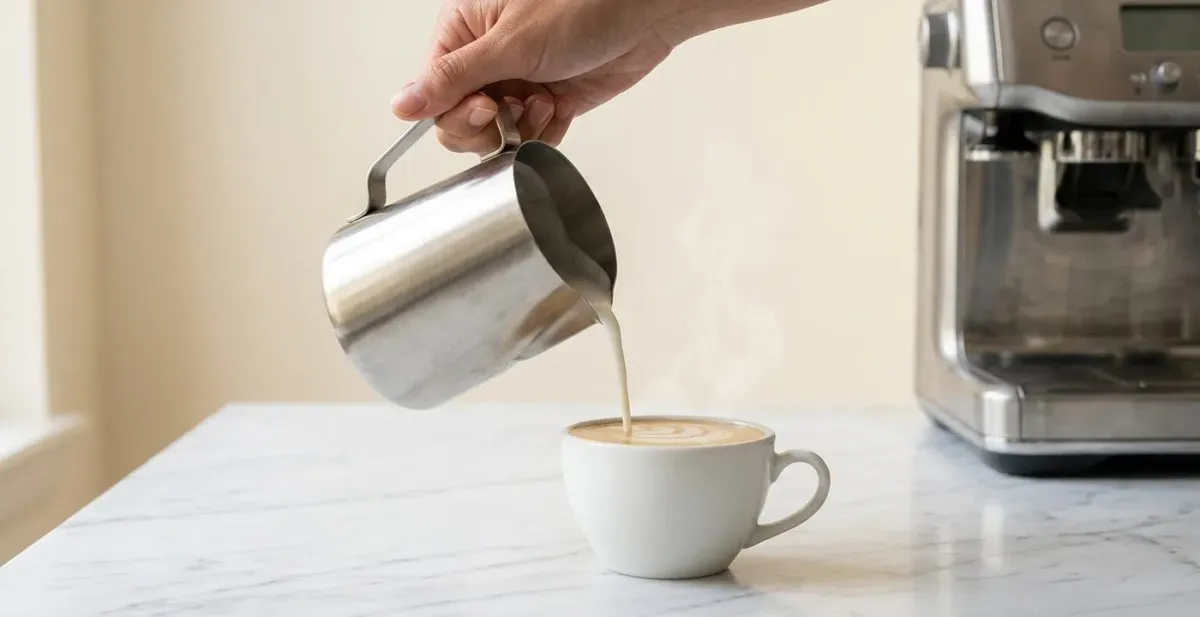
Table of Contents
Some of the links in this article are affiliate links, which help fund our independent review work at no extra cost to you. How we assessed these products is explained in this article and our Editor Lab methodology. No brand pays to appear, and no placement is guaranteed.
Bubbles instead of silky foam is usually an equipment problem, not a skill problem. How to froth milk well starts with matching the method, a jar, a handheld frother, or a steam wand, to what is already in your kitchen. A jar and a lid make a foam that works fine in a latte.
A handheld frother makes something finer. Only a steam wand produces true microfoam, milk that pours as one glossy liquid rather than sitting on top as a layer of bubbles. Pick your method below, then use the temperature, fill level, and angle in the next section, the part most guides leave out entirely.
“I spent nearly a year as a Coffee Trainer for UCC Coffee, teaching baristas across contract catering sites including some of the country's biggest coffee shop chains and pub groups, and milk was the thing everyone got wrong first. Every temperature, fill level, and angle here comes from that training and from testing the same full-fat milk through every method below with a kitchen thermometer.”
How to Froth Milk: Pick Your Method
You have four realistic options, and the right one depends on what you own and what you are making.
A jar with a tight lid, or a whisk, gets you a workable foam with nothing to buy. A handheld battery frother, costing less than a round of coffees out, gets you something noticeably better.
A steam wand is the only route to true microfoam, the glossy texture a flat white or latte art needs. An automatic milk system on a machine such as a De'Longhi heats and aerates for you, at the cost of some control.
None of these is the wrong choice. They produce different things, and this guide tells you honestly which one you hold.
The Two Temperatures and One Angle That Decide Everything
Every method below shares the same three targets, and getting them right matters more than which piece of equipment you are using.
What temperature should milk be for frothing? Aim for 60°C. At this temperature, milk tastes sweet, holds its foam without separating, and is ready for you to drink immediately. This is the number I train baristas to hit, and it sits inside the range professional guidance gives for steamed milk.
The upper limit matters as much as the target. Once milk passes roughly 70°C, the proteins holding the foam together start to break down. The foam collapses and the milk tastes scalded rather than sweet, a change you will notice within seconds.
Peer-reviewed food science backs the same window: research on heat-treated milk proteins shows whey proteins start denaturing above 65°C and break down sharply past 70°C, which is why a cheap thermometer is worth owning if you make milk drinks daily.
Fill level is the second number nobody gives you. Fill your jug or jar one third full, never more than half. Milk roughly doubles in volume as air folds into it, and a jug filled past half leaves nowhere for that expansion to go.
The third number is angle, and it only applies if you own a steam wand. Hold your jug so the tip sits just under the surface, off centre, at roughly a fifteen to twenty degree angle. That off-centre position creates the whirlpool that draws air into the milk cleanly, instead of spitting large bubbles into the middle of it.
How to Froth Milk Without a Frother
Half of everyone searching for this is trying to avoid buying anything, and this section is for you specifically, not an afterthought before a sales pitch further down the page.
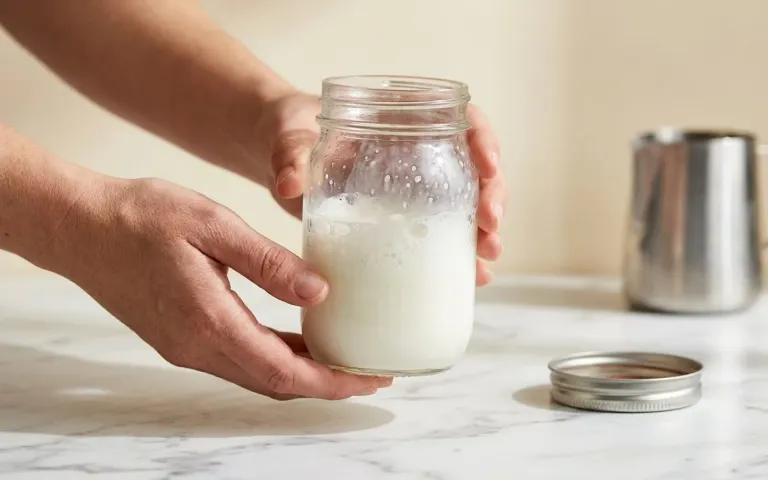
The jar and microwave method is the best no-equipment answer, and it takes you under two minutes:
- Warm your milk to around 60°C. In a microwave, this is thirty to forty-five seconds for a mugful. On a hob, warm until steaming but not simmering.
- Pour it into a jar with a tight, secure lid, filling it no more than one third full.
- Shake hard for thirty to sixty seconds, until the milk has roughly doubled in volume.
- Let the jar sit for thirty seconds, so the largest bubbles rise and settle.
- Spoon the foam onto your coffee, then pour the remaining milk underneath it.
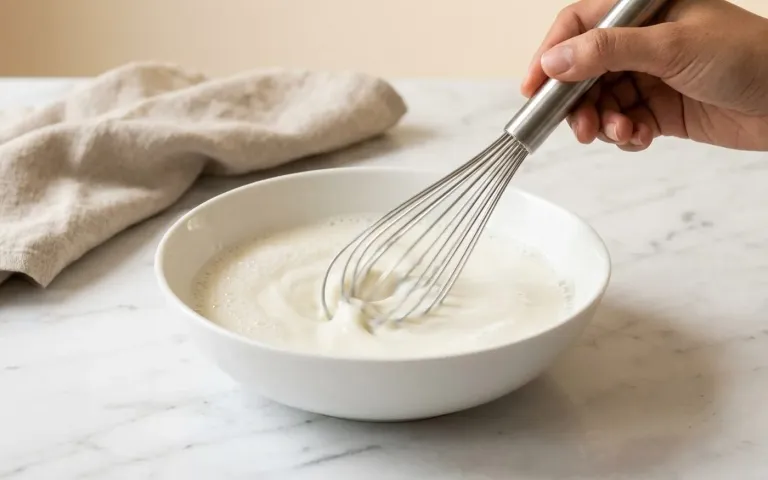
A whisk works on the same principle, moved briskly in circles through warmed milk for the same thirty to sixty seconds. It gives you dry foam rather than microfoam, a separate cap of bubbles rather than milk poured as one glossy liquid, and that is a different result, not a worse attempt at the same one. If you already know how to use a cafetiere, the plunger doubles as a frother: pour warmed milk into the empty cafetiere and plunge briskly for twenty to thirty seconds.
Can you froth milk with a spoon? Not in any way that produces foam worth the name. A spoon agitates the surface but cannot fold air through the milk the way a jar, a whisk, or a wand can.
If a spoon is genuinely all you have, warm the milk first and stir hard for a minute, and expect a thin, uneven skin rather than anything you could spoon onto a latte with confidence.
How to Froth Milk With a Handheld Frother
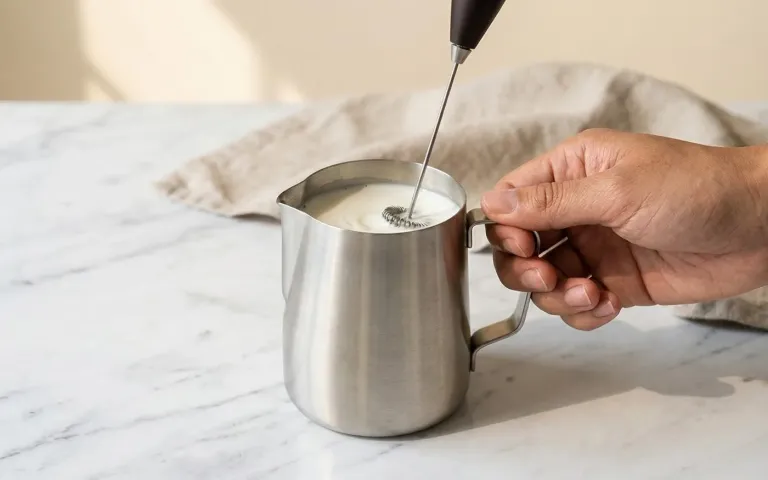
A handheld battery or USB frother sits between the no-equipment methods and a steam wand, and if you are making one or two milk drinks a day, it is the sensible middle option for you.
Warm your milk to the same 60°C target first. Handheld frothers heat almost nothing, so cold milk in gives you cold foam out.
Fill your jug to the same one-third mark, submerge the whisk head just below the surface, and hold it off centre rather than dead centre, for the same reason the steam wand angle matters: an off-centre position pulls air through the milk instead of just spinning it in place. Thirty to forty-five seconds is usually enough for you to see the volume double.
The foam is finer than a jar or whisk produces, but it will not hold up to proper latte art or sit as glossy as milk from a wand. For a cappuccino or a hot chocolate, that is more than good enough for you.
If you are chasing the exact microfoam a flat white needs, a jar, a whisk, and a handheld frother all reach their ceiling here, and the honest answer is a best milk frother, not a better technique. Our full guide to the best milk frothers covers which models earn the money.
How to Froth Milk With a Steam Wand
A steam wand is the only method here that reliably gives you true microfoam, in two distinct phases most guides describe as one motion.
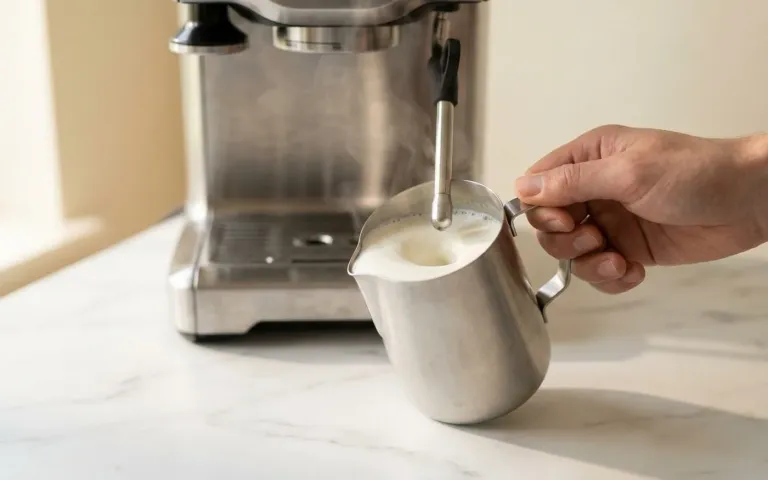
The first phase is stretching. With the tip just under the surface at the fifteen to twenty degree angle described above, you are folding air into the milk and increasing its volume.
You will hear a light, continuous hiss, not a harsh spit, and the surface should spin steadily in the whirlpool the angle creates. This should take up the first third of your total steaming time.
The second phase is texturing. Lower your wand a fraction deeper, still off centre, so the milk stops taking in air and instead spins the air already inside it into smaller bubbles. This is where large bubbles become genuine microfoam, and it is the phase most home baristas cut short.
Keep the jug spinning steadily until you feel the base warming under your hand, your practical signal that you are near the 60°C target without checking a thermometer mid-pour.
I have worked on some of the best machines in the world, Sanremo's Opera and Cafe Racer, a La Marzocco, a Victoria Arduino Eagle, and there is a genuine step up at that level of boiler pressure. A domestic wand on a machine such as the Sage Bambino is not trying to compete with that, and if you are learning to steam milk at home, it does not need to.
Lower pressure means a slower, more deliberate process. It asks for patience, not less skill, while you learn the angle and the whirlpool it creates.
Frothing Milk on a De'Longhi or Automatic Machine
If your machine has a built-in milk carafe or an automatic frothing wand, most of the numbers above are already set for you, the entire point of buying one.
De'Longhi's automatic systems, and similar carafes on other bean-to-cup machines, heat and aerate milk to a pre-set temperature and volume at the press of a button. The trade-off is control: you cannot adjust the angle or fill level mid-cycle the way you can with a manual wand, and the foam tends to sit closer to a handheld frother's result, dense and consistent rather than glossy. That is a fair trade for most households making the same drink every morning.
If your system produces foam that collapses fast or tastes flat, check the fill level first. Most carafes carry a maximum marking close to the one-third to one-half rule above, and overfilling is the most common cause of a disappointing result.
Frothing Oat and Plant Milks
If you have failed with a supermarket oat milk and blamed your technique, you were likely doing nothing wrong.
Standard oat milk has less protein and a different fat structure than dairy, so it splits more easily at the same 60°C target that works for dairy. Barista editions fix this: brands add stabilisers and adjust the protein-to-fat ratio so the milk behaves closer to dairy under heat. That is a formulation difference, not a technique failure, which is why the same motion gives you smooth foam with one carton and a curdled mess with another.
For any plant milk, keep the target lower, closer to 55°C, and go gentler on the aeration. Plant proteins are more heat-sensitive than dairy, and pushing toward 70°C collapses the foam faster than it would with dairy. Our roundup of the best oat milks for coffee names which barista editions hold up under a steam wand, since the label alone will not tell you that.
Why Your Milk Is Bubbles, Not Microfoam
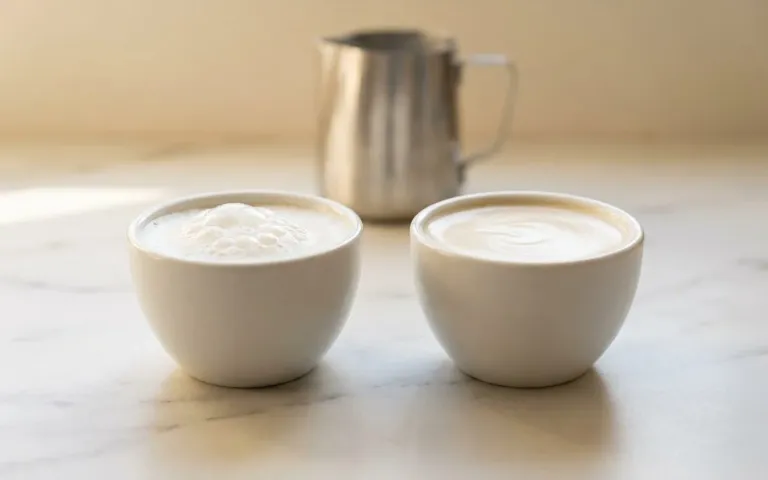
Microfoam is milk with air folded into it so finely that it pours as a single glossy liquid. Dry foam is a separate, scoopable layer of bubbles sitting on top. If your method only ever produces dry foam, you have not failed at microfoam, since that method was never going to produce it in the first place.
If your bubbles are large and uneven, the tip was probably held too deep and too still, adding air in large gulps rather than folding it in fine. Move it off centre and shorten the stretching phase.
If the foam collapses within a minute, you most likely overheated past 70°C, or aerated too long relative to how much you textured. Reduce one variable at a time.
If the milk tastes scalded or flat, that is almost always temperature: you have gone past 70°C, full stop. A cheap thermometer solves this faster than practice does.
If nothing happens at all, the tip has probably stayed fully submerged the whole time, heating the milk without ever pulling air into it. One more thing worth knowing, per Food Standards Agency guidance: reheating milk you have already steamed once, rather than starting fresh each time, froths worse and is not something you should do with dairy that has already been warmed and left standing.
Which Method for Which Drink
A jar or a whisk suits you for a latte or a hot chocolate, where the foam sits as a cap rather than being poured through the drink. A handheld frother covers the same drinks with a finer result.
A steam wand is the only method for a flat white, where the milk is poured through the espresso rather than spooned on top, or how to make a flat white in full if you want the pour technique alongside the froth. Latte art needs a steam wand and nothing else, and our guide to the best barista lessons in the UK covers where you can learn it hands-on.
None of this fixes what happens underneath your milk. Well-textured foam on a stale or under-extracted espresso still tastes like that espresso.
I founded Balance Coffee in 2020 on exactly that logic: the coffee has to earn the milk, not the other way round. Our guide to the best coffee beans in the UK is the place for you to start, and our best coffee beans for latte guide narrows that down further.
The same technique carries over if you are steaming milk for a matcha latte, poured over a whisked base rather than an espresso shot. Our matcha starter kit covers the whisking side of that drink.
There is a limit to what any written guide, this one included, can show you compared with watching someone do it. The whirlpool sound, the moment a jug feels warm rather than hot, the difference between a hiss and a spit, these are things a video demonstrates better than words describe.
The most shared answer in coffee forums points to a video from a well regarded coffee educator, not a written page, and that is a fair verdict. What this page adds is the part video tends to skip: the actual numbers you need before you press play.
How Each Frothing Method Compares
| Method | Equipment Needed | Time | Foam Type | Best For | Difficulty | Cost |
|---|---|---|---|---|---|---|
| Jar and lid | A jar with a tight lid | 1 to 2 minutes | Dry foam | Latte, hot chocolate | Easy | Free, if you own a jar |
| Whisk | A whisk and a wide bowl or jug | 1 to 2 minutes | Dry foam | Latte, hot chocolate | Easy | Free, if you own a whisk |
| Cafetiere plunger | A cafetiere | 1 to 2 minutes | Dry foam | Latte, hot chocolate | Easy | Free, if you already own one |
| Handheld frother | A battery or USB milk frother | Under 1 minute | Dense, fine foam | Cappuccino, latte | Easy | Low |
| De'Longhi or automatic carafe | A machine with a milk system | Under 1 minute | Dense, consistent foam | Cappuccino, everyday use | Effortless | Included with the machine |
| Steam wand | An espresso machine or bean-to-cup with a wand | 30 to 60 seconds | True microfoam | Flat white, latte art | Takes practice | Included with the machine |
Frequently Asked Questions
How do you froth milk without a frother?
Warm milk to around 60°C, pour it into a jar filled one third full, seal it, and shake hard for thirty to sixty seconds until it doubles in volume. Let it settle for thirty seconds so the largest bubbles rise, then spoon the foam onto your coffee. A cafetiere plunger gives a similar result if you own one.
How do you froth milk by hand?
The two realistic hand methods are a jar with a tight lid, shaken hard for thirty to sixty seconds, and a whisk worked briskly in circles through warmed milk for the same time. Both give you dry foam, a separate cap of bubbles rather than glossy microfoam, which is genuinely useful for a latte even though it looks different from a steam wand's result.
How do you froth milk with a whisk?
Warm your milk to around 60°C, pour it into a wide bowl, and whisk briskly in tight circles for thirty to sixty seconds until small bubbles cover the surface and the volume has visibly increased. This produces dry foam rather than microfoam, so expect a scoopable cap of bubbles rather than one glossy liquid.
Can you froth milk with a spoon?
Not in any way that produces foam worth the name, and it is worth saying so plainly rather than giving you hopeful instructions. A spoon agitates the surface but cannot fold air through the milk the way a jar, a whisk, or a wand can. If a spoon is genuinely all you have, warm the milk first and expect a thin, uneven skin rather than proper foam.
How do you froth milk in a microwave without a frother?
Warm the milk in the microwave for thirty to forty-five seconds until it reaches roughly 60°C, then pour it into a jar filled one third full, seal it, and shake hard for thirty to sixty seconds. Let it settle for thirty seconds, then spoon the foam onto your drink. This is the best result you will get without buying anything.
How do you froth milk on a De'Longhi machine?
Fill the milk carafe to its marked maximum, similar to the one-third to one-half rule for manual methods, and run the automatic frothing cycle. The machine sets the temperature and aeration for you, producing a dense, consistent foam closer to a handheld frother's result than hand-steamed microfoam. Overfilling the carafe is the most common cause of a disappointing result.
What temperature should milk be for frothing?
Aim for 60°C. At this temperature, milk tastes sweet, holds its foam without separating, and is ready to drink immediately. Once milk passes roughly 70°C, the proteins holding the foam together break down, the foam collapses, and the milk tastes scalded rather than sweet.
Why is my frothed milk bubbly instead of smooth?
You are most likely holding the tip too deep and too still for too long, which adds air in large gulps instead of folding it in fine. Move it off centre, closer to the surface, and shorten the aeration phase relative to the texturing phase after it. This single adjustment fixes the problem more often than any other change.

A wellness entrepreneur and biohacker, James explores the intersection of hospitality and health - from clean fuel and recovery tools to mindful routines that build balance into daily life.